1.How to connect to the computer
1.1 How to connect the USB board

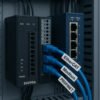
1.2 How to connect Ethernet board
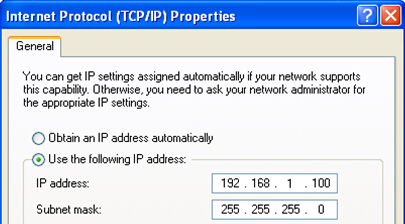
Use a network cable to connect directly to the computer
Then set the IP address manually on your PC:Open the network and sharing center > > local connection > > Properties > > Internet Protocol version 4 (TCP / IPv4), and manually set the IP address in the format of 192.168.1.0 ~ 179 (as shown below)
2.MACH3 Basic software parameters
2.1 Motor tuning
Open the software and select “setting” > > “motor tuning” (as shown below)
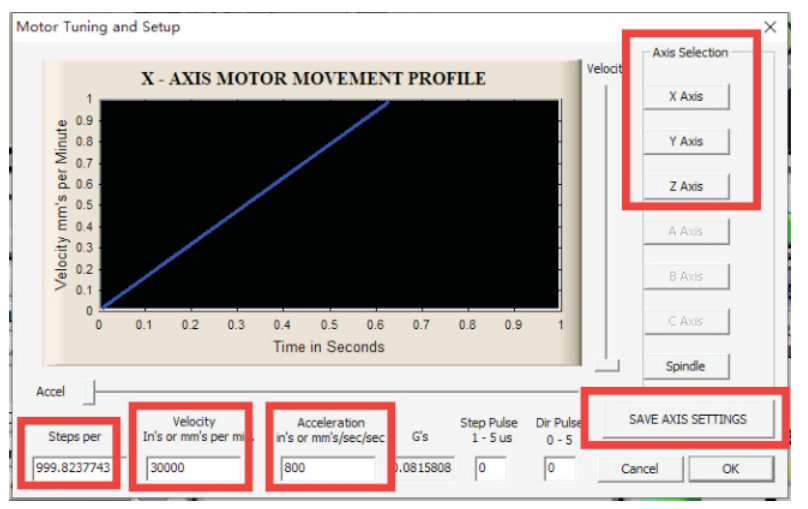
In the window, first select an axis you want to configure, next enter parameters and click „SAVE AXIS SETTINGS”. Now you can select and set the next axis. If we forget to click on „SAVE AXIS SETTINGS” all the changes will not be saved.
1、Steps per: For correct axis scaling you must know how many steps falls on a unit (millimeter, inch or degree). To understand how to calculate it.
2、Velocity: Maximum motor speed
3、 Acceleration:The greater the acceleration, the faster the motor accelerates. However, it should not be too large, which will make the motor unable to run.The ratio of maxspeed and acceleration is 20:1
2.2 Ports and pins
Mach3 Software,select “Config”>>“Ports and Pins” >>“Motor tuning”
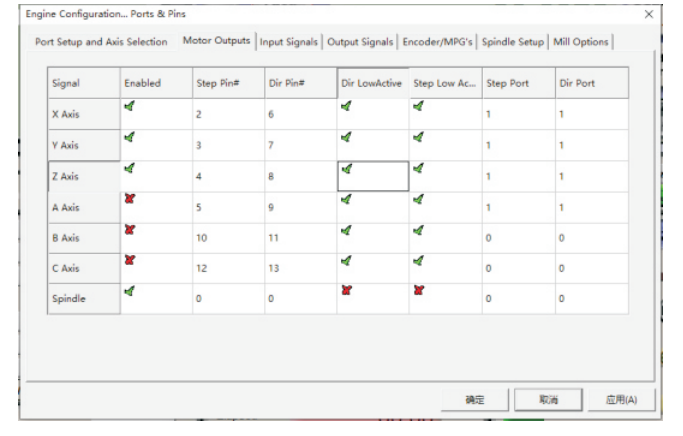
- Enable:Tick to make the axis output
- Dir Lowactive:Motor direction selection
- Step Lowactive:Tick to make the axis output
2.2.2 Input signal
pen Mach3 software,select “Config”>>“Ports and Pins” >>“Input signals ”
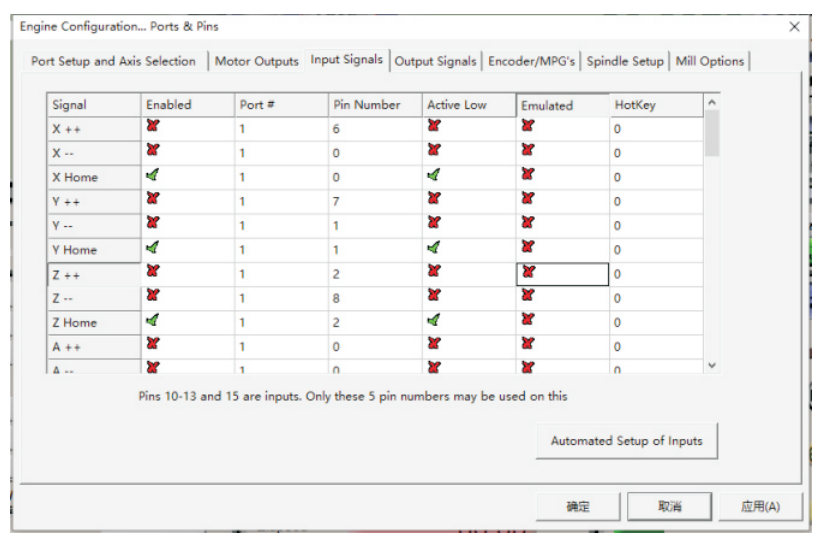
1.Enable: Tick to enable output ports
2.Pin Number: The control card input port
3.Active Lovw: Low level active, tick to enable
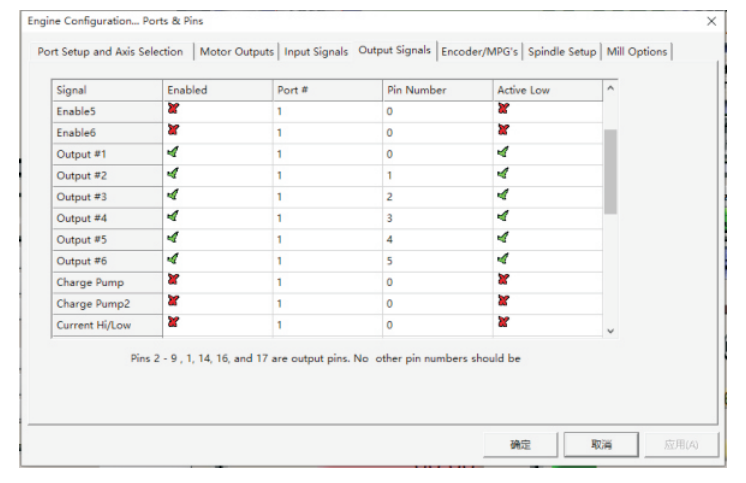
2.2.3 Output signal
Open Mach3 software , select”Config” >> “Ports and Pins” >> “Output signals ”
1.Enable: Tick to enable output ports
2.Pin Number: The control card output port
3.Active Lovw: Low level active, tick to enable
2.2.4 Spindle setup
Open Mach3 software , select”Config” >> “Ports and Pins” >> “Spindle setup”
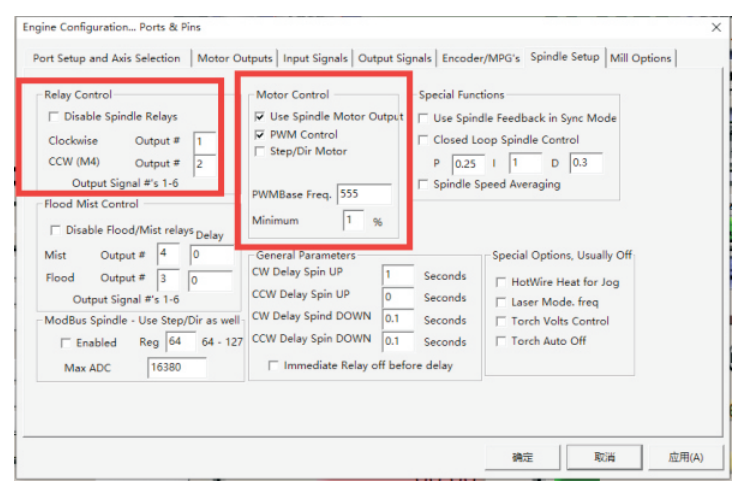
- Disable spindle relays: Cancel the tick
- Motor control:if your spindle is VFD, tick “PWM”; if your spindle is driver, tick “Step /dir motor”
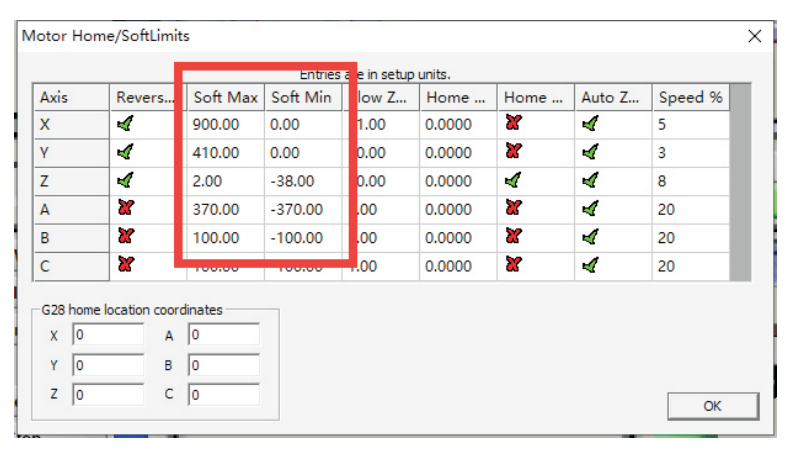
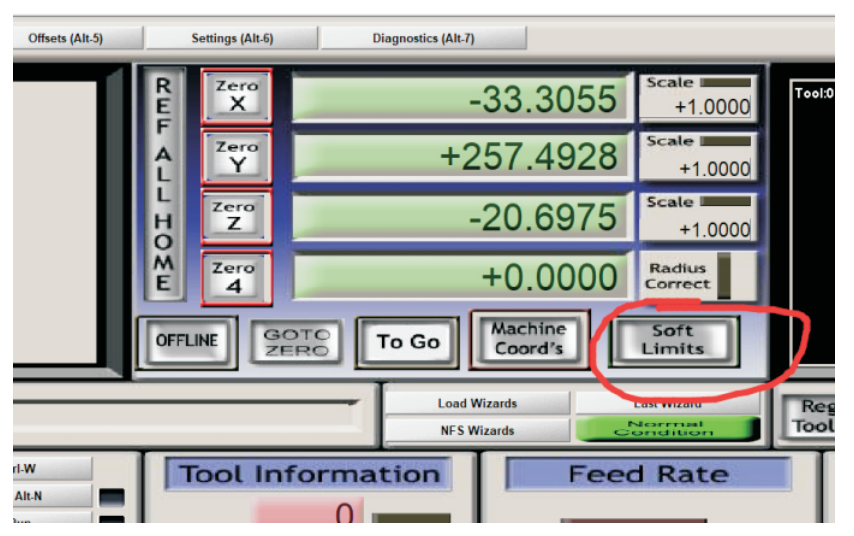
2.3 Software limit
Open Mach3 software,select”Config”>>”Homing/limits” option.
“Soft Max”:Software limit maximum machine coordinates
“Soft Min”:Software limit minimum machine coordinate
After setting up, click the “soft limit” button on the software to open the software limit function. When normal, the button will have a green light, indicating that the software limit is valid. It is important to note that if your machine’s current mechanical coordinates are not within the limit of the software you set, the press button can’t turn on this function. Please move the machine to the limit and press the button.
2.4 Driver plug-in control
open”Plugins control”>>“XHC Ncpod Config”
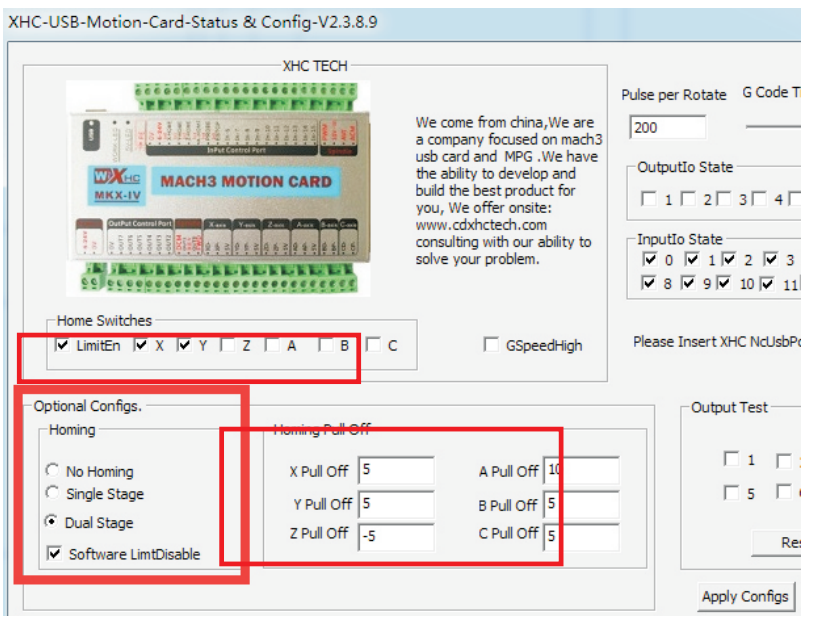
No Homing: not go to machine origin
Single Stage: go to machine origin only once
Dual Stage: go to machine origin twice
Homing Pul off: Origin fallback distance
Home Switches: tick “LimitEn” enable , and tick X.Y.Z and so on to allow it to have a limit function
GSpeedHigh: Tick,Increase the arc running speed
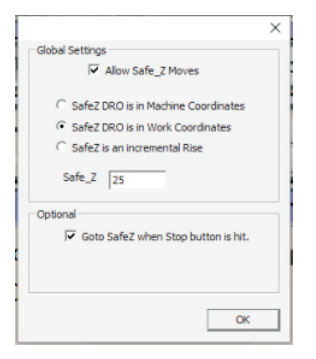
2.5 Z safety height
Open Mach3 software , select”Config” >> “Safe Z setup” option.
Tick”Allow safe Z move” enable;
tick “Safe Z DRO is in work coordinates” enable;
Fill in the “safe Z” height value;
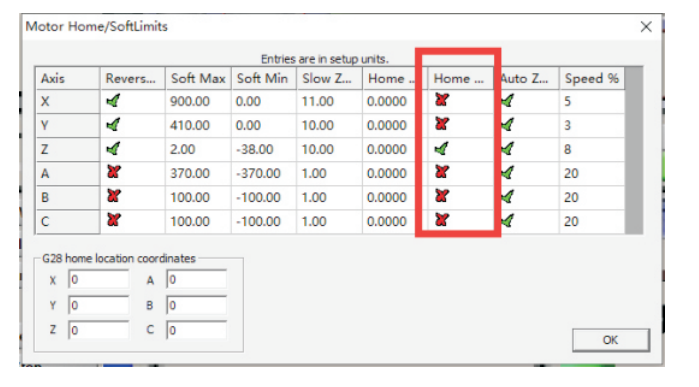
2.6 Motor direction of go to Home
Open Mach3 soft,select”Config” >>”Homing and Limits” option,when you click “Ref all home” button, the origin of the direction of an axis error , you can change”Home Neg” option,tick or cancel tick to make it correct.
2.7 General Config
Open Mach3 soft,select”Config”>>”General Config”option
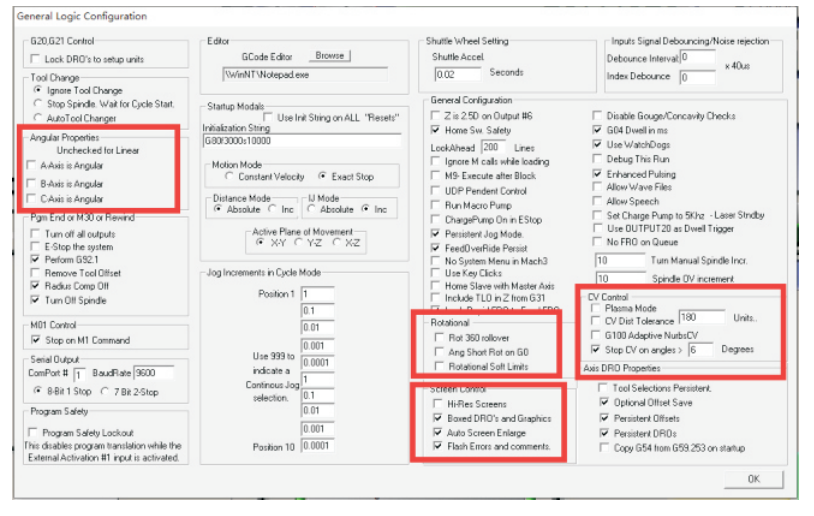
A-Axis angular: If your A axis is the axis of rotation, and the angle of rotation is 0-360 degrees.please tick it.
“Rot 360 rollover”:angle of rotation is 0-360 degrees.please tick it.”Ang Shot Rot on GO”: if you tick “Rot 360 rollover”, Please tick it too.Shortest path of circumferential motion.
Cv control: If your arc is not good, it turns into a right angle or a straight line, please modify the value of “Stop CV on angles”, and tick ti.Until you find a suitable value for you.
Screen control: When you first open the software, the screen is not full screen display, please tick “Hi-Res screens” and “Auto screen enlarge”, Save the settings and reopen the software.
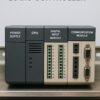
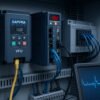
In Mach3-based CNC systems, selecting a stable and compatible motion control card is critical for accurate motion control and reliable machine operation. This tutorial uses the DAPPRA KA05 Mach3 USB Motion Control Card as an example. All wiring, software configuration, and Mach3 parameter settings described below are based on this controller.
If you would like to view detailed product information and specifications, please visit the DAPPRA KA05 Mach3 USB Motion Control Card product page .
Mach3 software operation
3.1 Open and Loading interface
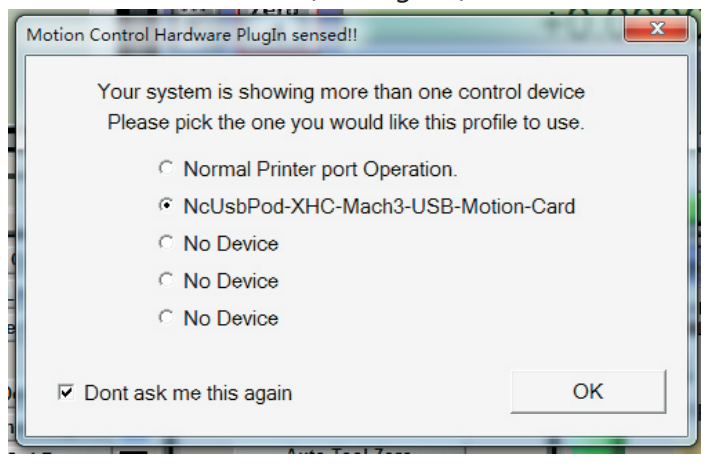
Click on“Mach3mill”icon to open software, If there is an interface to select the plug-in,please chose “NcusbPod-XHC -Mach3-USB-Motion-Card”(see Figure).
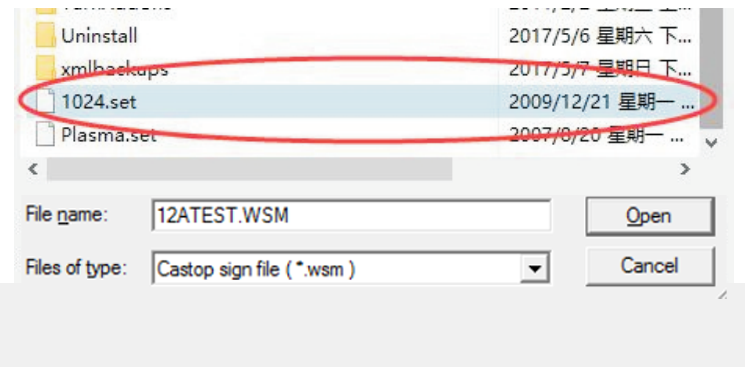
If you open the software, there is a blank interface,please chose…View>>Load screens,then chose screen file(see Figure)
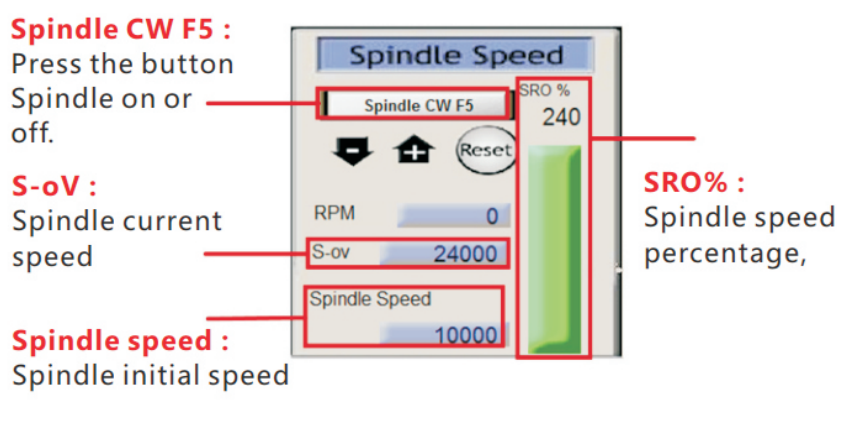
3.2 Spindle ON/Off
You can press the “Spindle CW F5”button to open or close spindle.(see Figure),and you can manual input G code:M3 (Spindle on),M5(Spindle off)
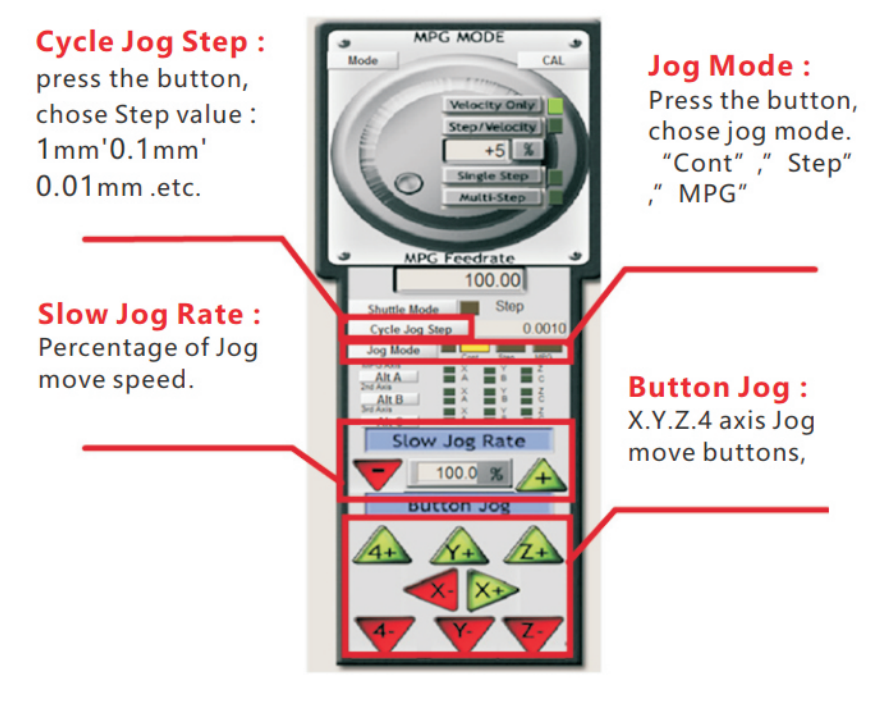
3.3 Jog move
Press the computer keyboard “Tab” key,
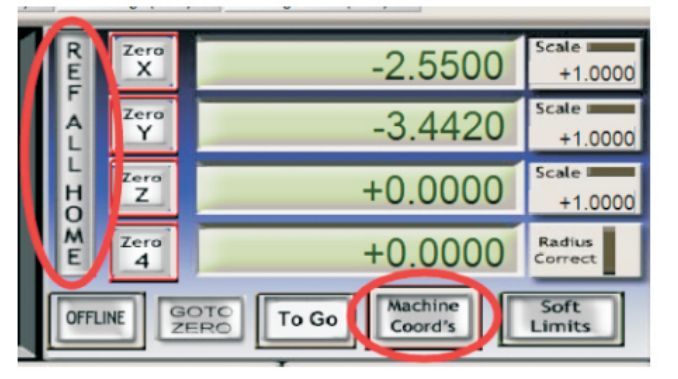
3.4 Go to Home of machine
Press “REF ALL HOME” button, all axis will going to home of machine and coordinate clearing.You can click the “Machine coord s” to see machine coordinate.
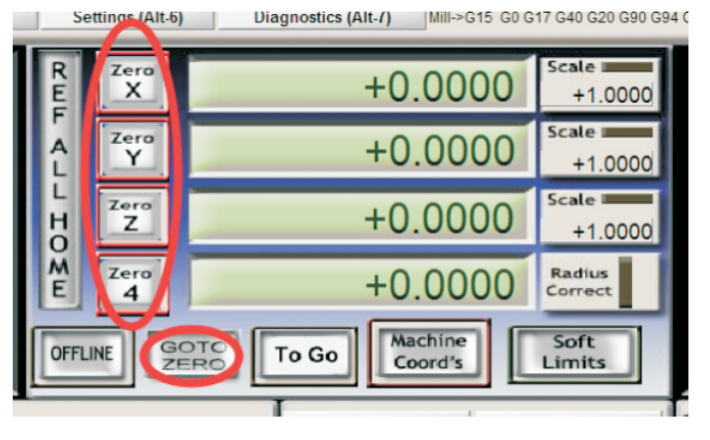
3.5 Go to Zero
Press the “Zero X” “Zero Y” “Zero Z” “Zero 4” buttons, The workpiece coordinates are cleared and set to the Zero of the workpiece.Click the “GOTO ZERO” button go to zero of workpiece.
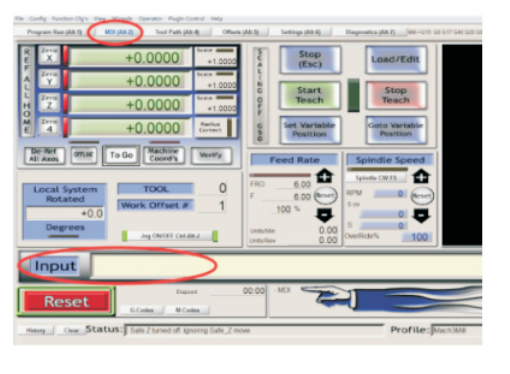
3.6 Manual input G code
When you need input G code,please click the “MDI(Alt-2)”,then click the “Input” and input G code.
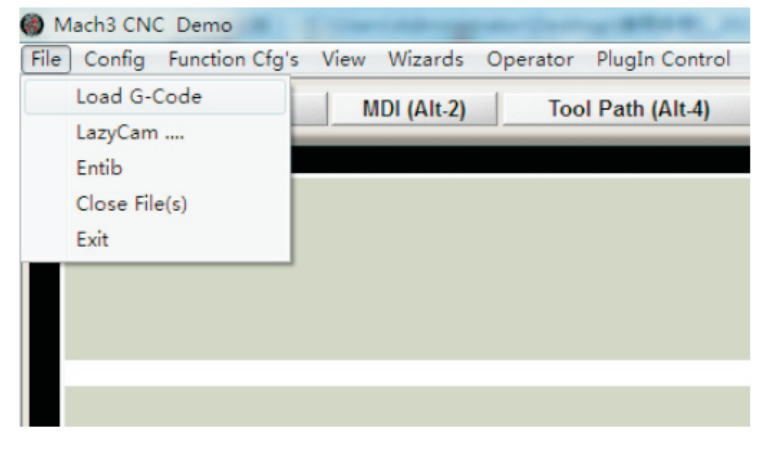
3.7 Load G code
MACH3 software only supports G code files. Please choose “File” >> “Load G-code”, and choose your processing file.
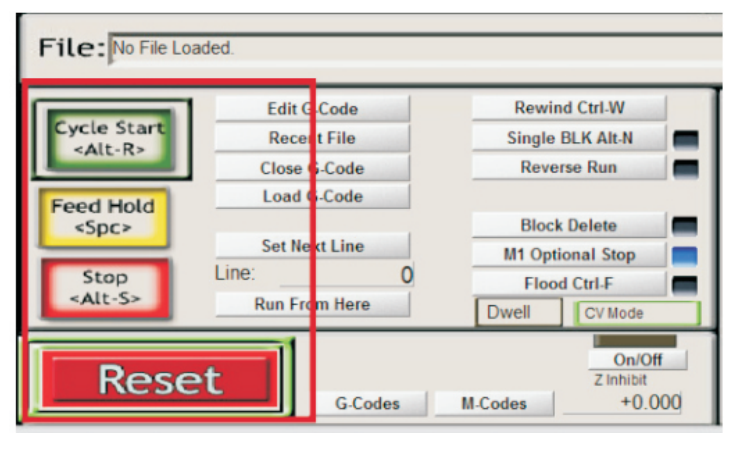
After the program is loaded, click “Cycle Start” and the program starts running;Click “Feed Hold” and program pause; Click “Reset” and software emergency stop.
3.9 Z Auto Tool Zero
1.Open our CD… English Manual>>macro folder, and cpoy M930 code to…C:/Mach3/macros/Mach3Mill folder.
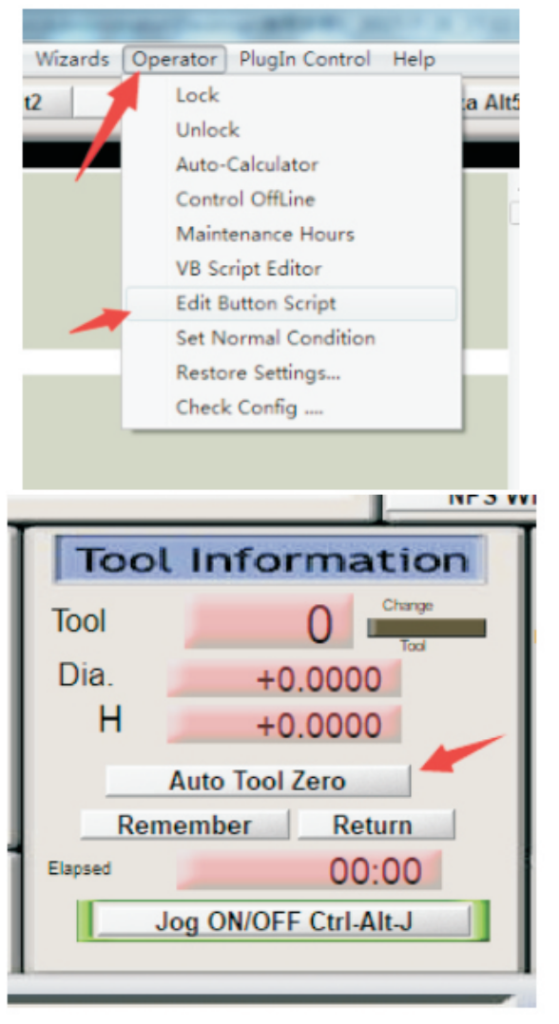
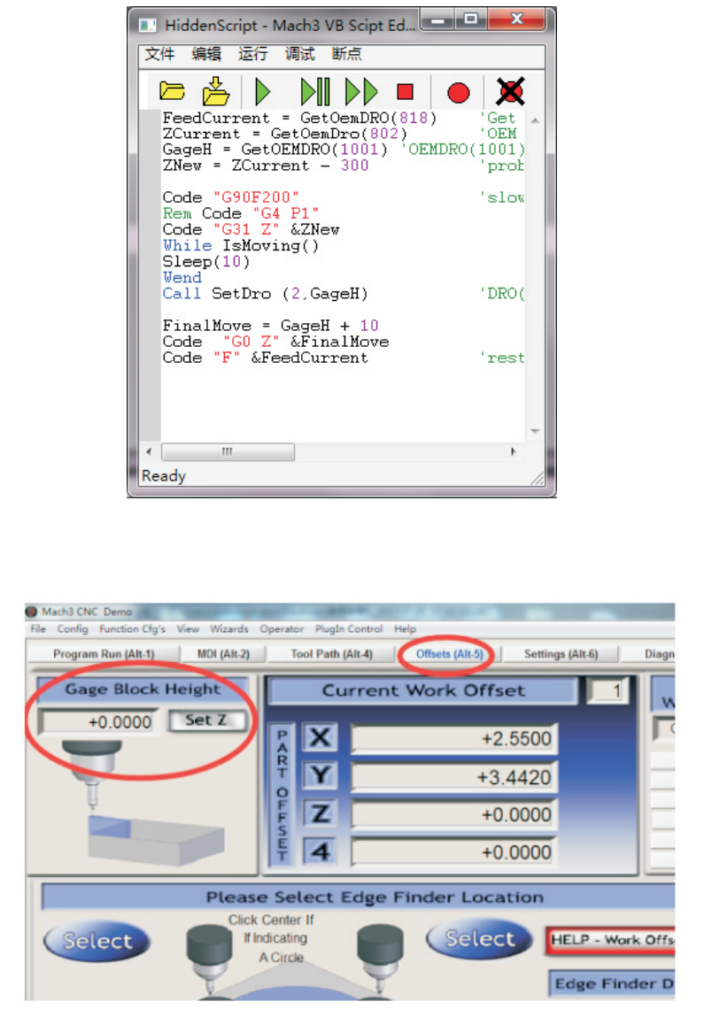
2.Open the M930 file in TXT format , then copy all program code. Open MACH3 software, click the “Operator” option , click“ Edit button script” , ( Figure 1 ).Then click “Auto Tool Zero” button,delete the code in the button script, and then paste the copied M930 code program. (Figure 2 )
3.In “Offsets”interface to sets Gage Block Height ( Figure 2 )After the setting is completed,click“ Auto tool zero” .
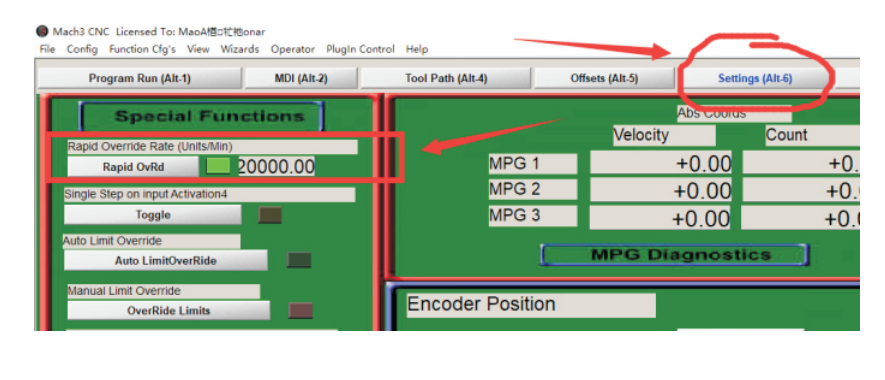
3.10 Set G0 speed
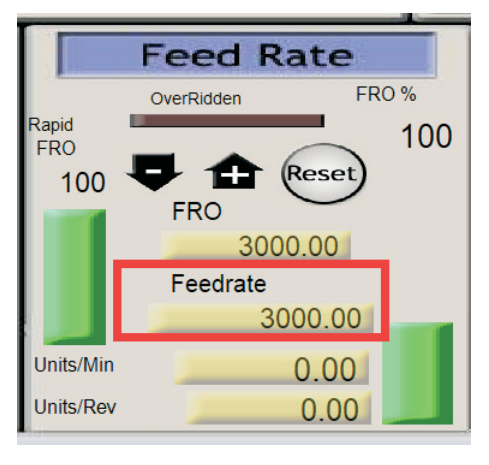
3.11 Set Feed speed
1、In G code, F code to set feed speed.
2、In Feed Rate to set feed speed.
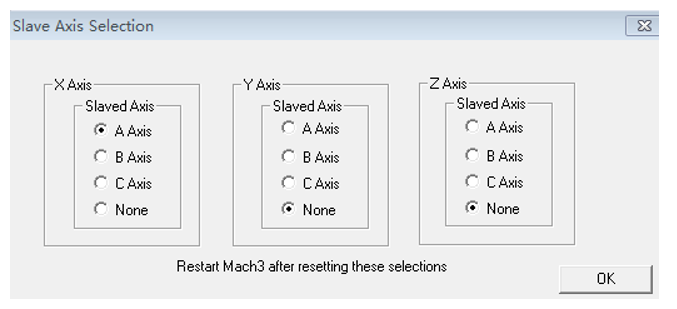
When the A axis is configured as a slave axis of the X axis (Config → Slave Axis), the A axis does not operate independently and follows the X axis motion.
To ensure correct homing behavior, an independent A-axis Home input must be enabled and connected:
- Set the A axis as a slave of the X axis in Config → Slave Axis.
- Enable the A Home signal in Config → Ports and Pins → Input Signals.
- Connect the A-axis home switch in the same way as X, Y, and Z home switches.
- Click Ref All Home.

During homing, Mach3 will automatically home the master axis (X) and its slave axis (A) at the same time.
If the A Home function is disabled or no A-axis home switch is connected,the slave A axis will not perform homing, which may cause gantry misalignment.
Product Selection Table – Mach3 Motion Control Cards
Use the table below to quickly select the most suitable Mach3 motion control card based on axis count, communication interface, and MPG handwheel support.
| Model Category | Axis Support | Interface | Mach3 Support | MPG Handwheel | Typical Applications |
|---|---|---|---|---|---|
| Mach3 Control Card | 3 Axis | USB | ✔ All Versions | Wired / Wireless | Entry-level CNC routers, engraving machines |
| Mach3 Control Card | 4 Axis | USB | ✔ All Versions | Wired / Wireless | Standard CNC routers, rotary axis applications |
| Mach3 Control Card | 6 Axis | USB | ✔ All Versions | Wired / Wireless | Advanced CNC systems, multi-axis linkage |
| Mach3 Control Card | 3 Axis | Ethernet | ✔ All Versions | Wired / Wireless | Industrial CNC with higher stability requirements |
| Mach3 Control Card | 4 Axis | Ethernet | ✔ All Versions | Wired / Wireless | CNC machines with rotary axis and long cable runs |
| Mach3 Control Card | 6 Axis | Ethernet | ✔ All Versions | Wired / Wireless | Professional multi-axis CNC and automation systems |
How to Choose the Right Model
- Choose 3-axis if your machine is a standard CNC router or engraver
- Choose 4-axis if you need a rotary axis or more flexible machining
- Choose 6-axis for complex motion control or multi-axis linkage
- Choose USB for easy setup and general applications
- Choose Ethernet for better noise immunity and industrial environments
- Add MPG (wired or wireless) if precise manual jogging and setup are required
Product Links
For detailed specifications, pricing, and ordering information, please visit the product pages below:
3-Axis Mach3 USB Motion Control Card (KA03)
👉 View Product Details
4-Axis Mach3 USB Motion Control Card (KA05)
👉 View Product Details
Mach3 USB Wireless 4-Axis MPG Pendant Handwheel (KA02)
👉 View Product Details
Mach3 USB Wireless 6-Axis MPG Pendant Handwheel (KB05)
👉 View Product Details


Tambah komentar
Anda harus masuk untuk berkomentar.